HOW TO CLIMB +
Rock Climbing Technique
It’s not what you grab, it’s how you use it. The A to Z on maximizing what the rock (and plastic) gives you.
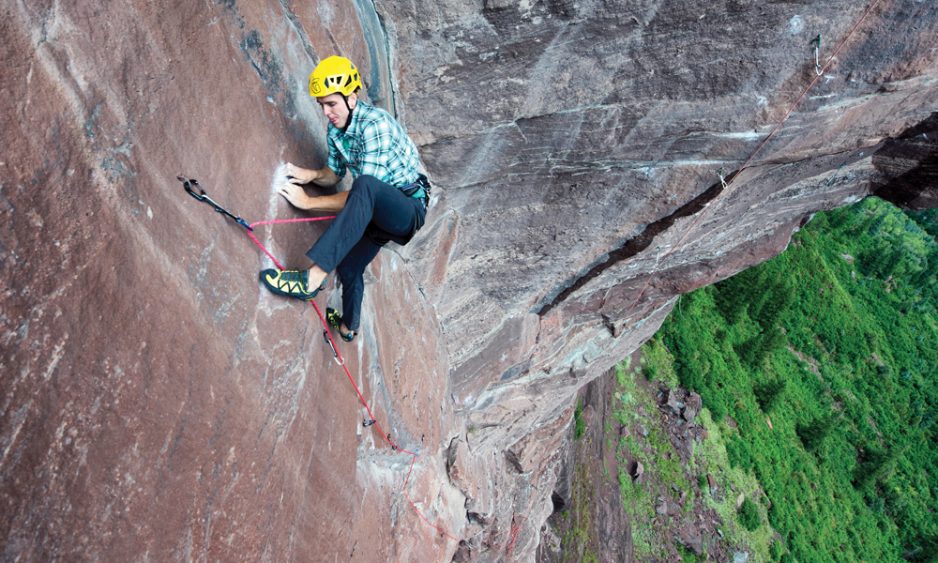
Learn to move efficiently in the vertical realm and you will be rewarded with a lifetime of challenges.
Learning to free climb—to pull and step on only the rock’s natural holds, never using equipment as an aid—is liberating and exhilarating. When you discover how to bear down on edges, stick to slopers or relax in a handjam, you’ll be stoked. Though no text could ever substitute for experience, here is an outline of basic movement techniques to help you get going. Learning to free climb is as natural as climbing a tree, but doing it well is a long process. Learn to move efficiently in the vertical realm and you will be rewarded with a lifetime of challenges.
You can broadly divide free climbing into two categories, face and crack climbing, although you will often use combinations of both. Cracks are the most obvious lines of weakness on cliffs, but the techniques to climb them are not as evident as in face climbing. Climbing technique comes down to linking basic foot, hand and body positions into a flowing, upward motion. The basic positions are easily outlined, but the infinite number of permutations complicates the free-climbing experience. Each climb is a Rubik’s Cube with an infinite number of ways to be unlocked, which is why climbing is so beautiful, interesting and addictive.
FOOTWORK
Foot technique is your most useful (and the most misunderstood) tool. Whether you’re on an overhang or a low-angle slab, the idea is to keep your weight pressed onto your feet. Beginners tend to hug the rock and/or grope too high for out-of-reach holds, making it hard for them to see and use their feet. An erect, athletic, in-balance posture is the ticket. Remember that your legs are stronger than your arms—take advantage of that. Practice your footwork and get used to lifting your weight with your lower body.
Any foothold you’ll encounter requires precision. If you just slap your shoes onto holds you’ll never hit the sweet spot and your feet will forever be slipping and slopping. It’s best to practice on easy routes, but always strive for precise and coordinated foot placements. Foot technique can be broken down into three basic positions:
Edges are flat or semi-flat ridge-like holds. Step on any edge with the front part of your foot, the ball-to-toe portion, using the inside edge of your shoe. You can also edge off the outside of your shoe, either to rest your foot or simply because that foot position offers you the best balance. In all cases, think like a ballerina. Be precise and light on your feet.
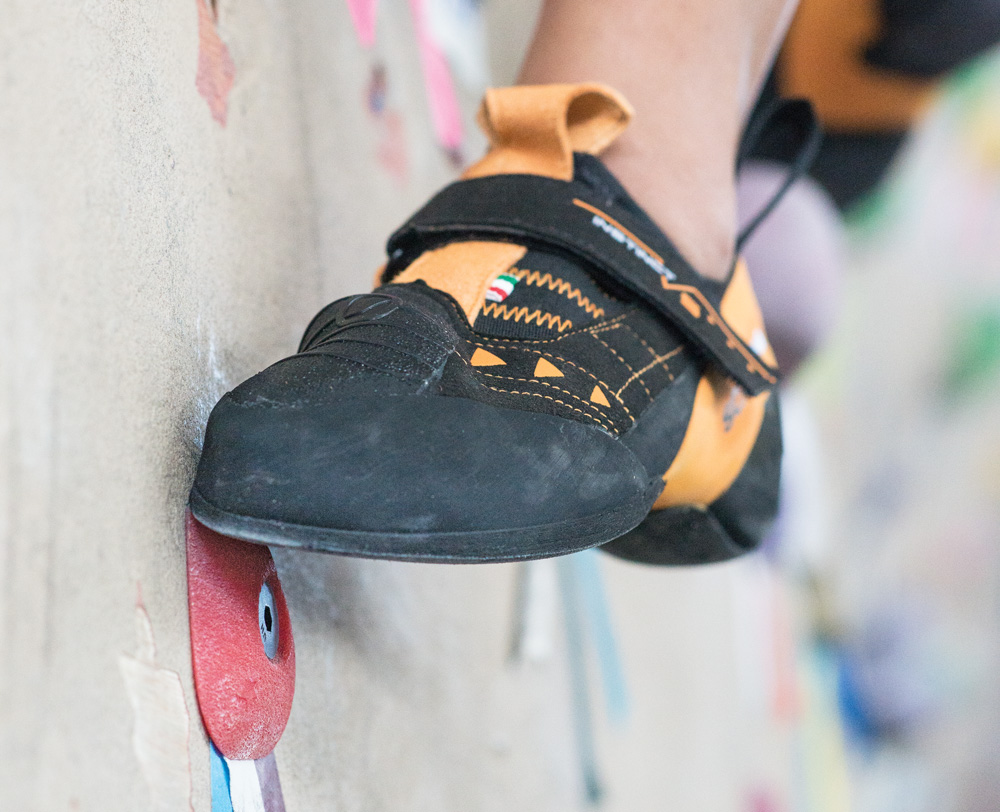
Inside edging, the most common foot position. Don’t just plop your foot onto a hold. Concentrate on being precise, and pushing the edge into the wall.
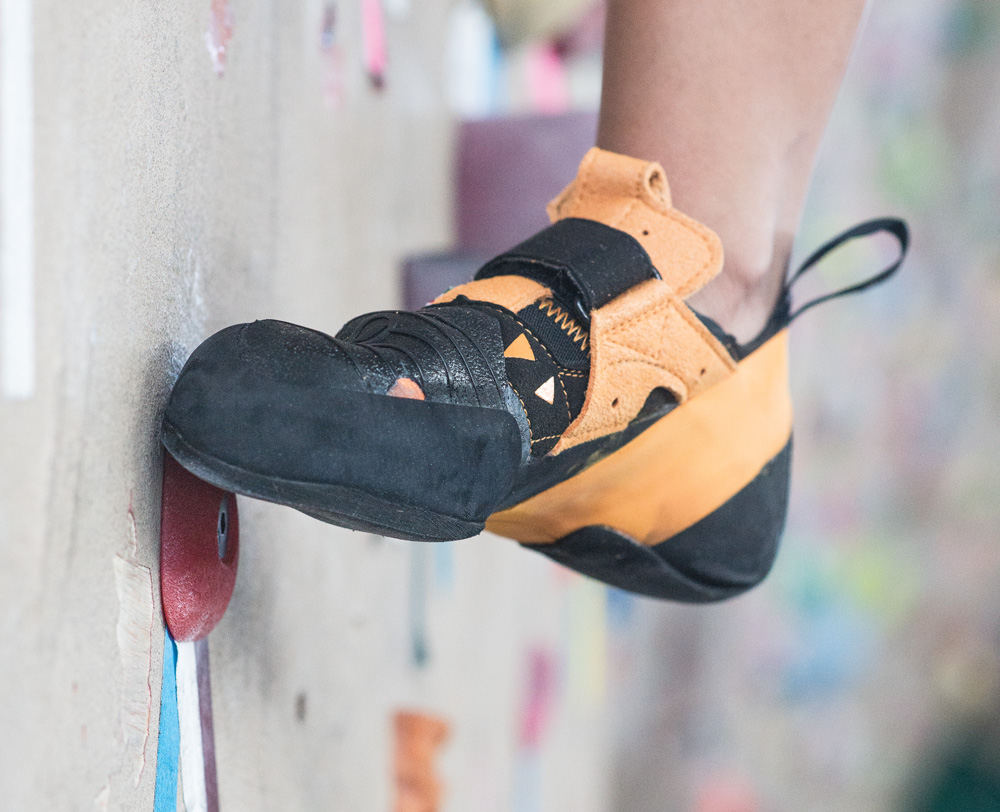
Sometimes outside edging will keep you in better balance; other times it lets you rest a tired foot.
Hooking There are two basic types of hooks: heel hooks and toe hooks. Both are advantageous because when you pull with a foot, you take weight off your arms. To heel-hook, place your heel on a hold, usually above or level with your upper body. Snug shoes with stiff heels help greatly. Set your heel, then pull with your foot. It’s as simple as that and the nuances of the technique will come naturally. Toe-hooking is more rare, but useful, especially for keeping your body parallel to the wall on overhanging terrain. To toe- hook, wrap the top of your foot around a corner, above a lip or in an “undercling” position. Toe-hooking gives you a few more inches than heel-hooking. When you see an arête or edge that could be heel-hooked, but you can’t quite reach it, try using the top of your foot or even the instep, to hold your body in place.
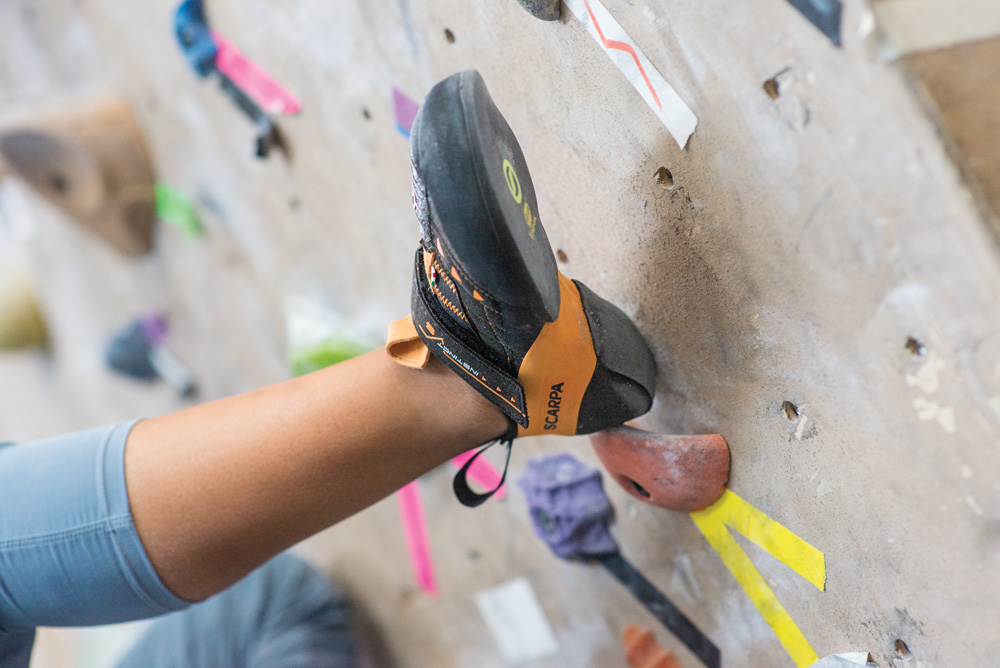
Heel-hook to get weight off your arms, especially on overhanging terrain. Set the heel and pull, but not so hard you injure your groin.
Toe-hooking can keep you from swinging off, and is especially useful when you are climbing an arete. Don’t forget about this often inobvious foot position!
Smearing This is the next technique to master; it’s harder than edging because you can’t necessarily “see” a smear. Depending on your body position, almost any hold, even a seemingly blank place on an overhanging wall, can be smeared. Smearing utilizes friction and doesn’t depend on having an edge to weight. The key to smearing is to maximize rubber-to-rock contact, using the upper ball of your foot and toes to press hard on indentations, dishes, bulges, and other angle changes within the sloping hold. In general, if a smear starts to slip, fight your instinct and weight it more—additional pressure will increase the friction. Difficult smears don’t tolerate foot slop, so place your shoe precisely, then keep it still. A good way to practice smearing outside is to find a low-angle, smooth boulder and smear up it without using your hands. To practice inside, find a route in the gym with big handholds and practice smearing up the route using the blank wall, instead of standing on the footholds.
HANDHOLDS
A great jug that’s suitable for resting. Grip it with a relaxed hand. On difficult routes, aim to get to each jug, shake, and recalibrate your mind.
Climbers have about as many words to describe shapes in the rock and how we grip them as ace-climber Adam Ondra has screams. The numerous positions we can contort our fingers and hands over various rock shapes is astounding. Efficient rock climbers use their hands for stability, not just to haul themselves up a climb. Using your bulging biceps to muscle through a tricky section is sometimes unavoidable, but remember that footless climbing is called “campusing,” and should be done only when necessary, which is rare. Grip holds with slightly bent arms, using your feet to push you up. Here are the general types of holds that you, the apprentice grimper, should know:
Jugs Ahhh jugs, aka buckets, aka the biggest, easiest holds around are named after “jug handles.” Your first route will likely be covered in jugs, and while they may feel easy, there’s definitely technique to jug climbing. Grab jugs (and, in fact, this goes for every type of hold) using as little energy as possible. Learning to conserve strength by not over-gripping is fundamental, and you should learn this technique on holds that are easy to hang onto. Don’t pull the jug close to your chest in order to scope the next move, but scout from a restful, hanging position. Jugs are also great places to shake out, chalk up, place gear and compose your mind.
Crimpers These are fingertip-sized edges that you’ll either grip in a crimp or open-hand position. For the crimp, place your fingers on an edge and curl them such that your finger joints are bent up, then wrap your thumb over your index finger. This is the most powerful position for tiny holds, but also the most injury-prone as it places high stress on tendons.
Crimping is the most powerful hand position, but stresses the fingers. Reserve it for holds you can’t latch with an open hand.
Use the open-hand grip as much as you can. This position is less likely to injure your fingers, and is the best for building contact strength.
The open-hand crimp is usually for easier holds that you hang onto with more relaxed fingers, but you can grip most crimp holds with an open hand, and that is actually preferred. The open-hand grip places less stress on your fingers, and builds finger strength.
It’s tempting to jump onto the fingerboard, campus board or system board at the gym when you want to practice your crimping. But, the pros who do single-finger crimper pull-ups on YouTube didn’t start with those routines, and neither should you. Tendons, ligaments and bones take about two years to adjust to the serious strain that training boards put on them— crimping up a climb is fine, but wait those 730 days before you jump on crimp-trainers at the gym.
Use your thumb on the underside of a hold, pinch-style, to power up your grip. Sometimes a thumb catch will be obvious, but other times it can be as subtle as a faint divot. Experiment.
Pockets Pretty much every gym has an abundance of these holds, and you’ll need to know how to use pockets to climb limestone. Using a pocket is as simple as getting as much finger meat as possible into the hole, then gripping the inside of the hole and pulling. Be careful: as with crimps, putting so much weight onto a single finger, or even a few, is a recipe for injury when you’re new to climbing. Search around inside the pocket for the sweet spot, which is sometimes hidden toward the back, the side or even at the top. Get as many fingers as possible into a pocket, which can mean stacking your fingers by placing digits on top of digits. Experiment with fingers, too: some people find their ring fingers are stronger than their index fingers, and prefer to use them when a pocket will only take three or fewer fingers.
Pinches This technique utilizes that important digit that separates us from most animals: the opposable thumb. The classic pinch is a protrusion that you can squeeze. Pinches, however, can be angled in any direction, so be open-minded. Pinches are often easier to hold onto than crimpers, therefore look for thumb indentations near crimpers that can turn an unusable edge into a bomber pinch.
Slopers are usually the most difficult of all holds to latch. The tricks are to 1) Find the sweet spot, which might be a slight flat place. 2) Pull down, not out, and activate your core. 3) Engage your thumb; don’t just set it on the hold. 4) Think positively—holding a tough sloper is as much a mental as physical challenge.
Slopers To hang onto big, rounded and poorly angled holds, aka slopers, you rely solely on friction, so chalk up. Slopers, since they are so inobvious and difficult to use, require more technique than most holds—weight distribution and correct body position is paramount. Place your hand onto a sloper and keep your fingers closer together for added strength. Try to get your body under a sloper as much as possible. Keep your arms straight and forearms close to the rock. Bear in mind that once you have a solid hand position on a sloper and are leveraging upward, it may be easiest to rotate your hand sideways, thumb toward the wall, to maintain a frog-like stance and keep yourself from losing purchase and teetering outward. Most slopers have a spot that is less sloping than everywhere else. Feel for that and take advantage of it. Slopers are also temperature dependent: a sloping hold that seems impossible to use when it is warm can feel easy when it is cooler.
Underclings and sidepulls Two variants of the same idea, underclings (upside-down holds) and sidepulls (vertically oriented grips) are holds that are only good when you find the right body position. To best use underclings, you’ll want your feet high so you can pull up on your fingers and press down on your feet. Sidepulls operate similarly, and become useable when your feet and legs are used in opposition with your hands. Maintain a straight arm on the sidepull, leaning hard away from the hold.
BODY POSITION
Climbing is about balance, movement and efficiency of motion. Sure, the power to do a one-arm, fingertip pull-up may help you in some situations, but it won’t help you on a balancy, slab move. Good body position is key. The following is a list of common techniques with suggestions on how to tackle different terrain and features. Read on with this caveat in mind: there are no rules. Each climb calls for different technique. Don’t over-focus on the way it “should” be done. Use your intuition.
FOOTWORK IN THE GYM
Delicate footwork is the key to pow- erful climbing. When you practice in the gym, try and step on each foothold so daintily that your shoe is silent on contact. Start your training with the “simple” footholds: edging and smearing. Practice these on long toprope routes so you won’t be leery of falling, and, so you can cram as many foot placements into a route as possible. Get to the bouldering gym to practice your hooking techniques: Rope routes usually won’t have many hooking opportunities, and if they do the difficulty will seem somewhere around 5.Ondra for a beginner.
Think of yourself as a tripod and keep three points of contact with the rock whenever possible. In other words, move only one limb at a time. Use your legs to push you up, and minimize reliance on your arms. A common mistake newcomers make is to always search for that perfect, secure handhold, when they should instead look down for footholds. Climbing involves pushing and pulling with the whole body, not just hands and feet, and focusing on your “center.”
Manteling This technique involves pressing down, using your arm and shoulder muscles to drive holds to, or below, waist level, as if you’re getting out of a swimming pool. The mantle is generally used to gain a ledge, large or small, where there are no reachable handholds above. This technique requires strong shoulders and triceps, good balance and the flexibility to “match” (when two appendages use the same hold) your foot and hand, often using a heel-hook.
Slabs won’t pump you, although it is surprising how strenuous a hard slab can be, because although the angle is less than vertical, the holds can be micro. Slab climbing is a footwork and balance game. Strong feet and legs are assets. Moving quickly is not as important as linking holds with correct positions. Use your arms to push yourself out from the slab so that all your weight is centered over your feet. Try not to get too stretched out, as this causes feet to slip.
Overhangs On overhanging sections, you’ll need to conserve energy. Moving quickly is one way, but moving efficiently is better. Hang relaxed and avoid over-gripping. If you’re getting pumped, look for good footholds to stand on, rather than searching for a jug. Correctly dealing with inflamed arms is a mental game: instead of mindlessly groping for holds when you become tired, relax and focus on your breathing.
Climbing well on overhanging rock requires milking the feet and legs for all they’re worth. Keep both feet on the rock or wall as much as possible—overhangs are not for campusing. If your feet pop, get them back on the wall asap. Rests can be found almost anywhere— ever see someone hang upsidedown (aka “bat hang”) from a kneebar? Look ahead and break the route down into smaller, manageable sections, moving from rest to rest. Unless your fingers are drenched with Nile-like rivulets of sweat, do not bother chalking up on extreme overhangs; you’ll just tire yourself out.
Even in the gym you can take advantage of stems, essentially opposing footholds, to unweight your arms. On rock, you’ll most typically stem in a dihedral or chimney.
Stemming This is pressing your feet against two opposing planes, bridging the gap to take weight off your arms. Gyms usually have a handful of corners or opposing holds to stem on, while outside stems typically follow dihedrals or corners, and can be gear protected because the corner usually forms a crack. Stemming is an excellent technique to master because it provides stability and security when your arms are pumped.
The master stemmer can find rests where most people cannot. When you stem, walk your feet up one at a time by weighting your arms and one foot, while sliding the other foot upward. You’ll often press your palms against either side of the dihedral, looking for good “palm smears.” When you stem with your arms, you’ll likely be using holds at your waist that you can press down on. Stemming is in no way limited to dihedrals. Look for opposing footholds, even on vertical planes of rock that allow you to get weight off your hands and onto your feet.
Layback The layback is a position of opposition, where your feet push against the wall while using consecutive sidepull handholds, usually a long crack, facing the opposite direction. This solid, but strenuous technique usually requires a shuffling rhythm—hand, hand, foot, foot. Keep your arms straight and your feet high. The closer your feet are to your hands, the more strenuous the position, but the more locked on you are; the smoother and steeper the rock, the higher your feet must go.
Laybacks are often found on splitter cracks, flakes, or in dihedrals with cracks. Stopping in the midst of a layback to place gear is strenuous. Sometimes it’s better to just climb until you can find a stemming rest to place gear, or, throw a handjam and hang from this while you set pro. When you are laybacking a dihedral, jam your lower, inside foot into the crack, big toe up, and smear and edge your outside foot against the rock. Usually, you can friction off your shoulder and side, taking some of the weight off your arms.
A layback being used with a backstep (left foot) to drive up the wall. On rock, you will typically layback in a dihedral, and climbers who don’t know how to jam may try to layback up a crack, an exhausting technique.
The dropknee (right leg) lets you rotate into the rock and use your hips to push you up, rather than rely entirely on your arms. A dropknee can be just the trick for getting extra reach, but it can also wrench your knee. Use with caution.
Dropknee Here’s a fancy way to get your hips close to the wall and utilize footholds that are otherwise unusable. To dropknee, place the outside edge of your foot onto a hold, and swing your knee downward. Dropknees are a great way to get your weight close to the wall on overhanging routes. Dropknee footholds are mostly found away from the body. Stretch your leg to the hold using the front point of your toe and then twist your knee toward the wall. Be careful: dropknees can irritate the cartilage in your patella and/or blow out your knee tendons and ligaments.
Dropknees are especially useful when climbing overhanging sections. Lock off with one arm, drop- knee on the opposite side of your body, and then reach for a distant handhold with your free hand; this is called a “twistlock.” The twistlock is great for increasing your reach on overhangs where you would otherwise need to lunge, which usually pops your feet off the wall.
Constantly be on the look out for kneebars. This devious technique can unweight your hands completely, and on some routes can reduce the grade by a letter or two.
Kneebar This technique allows you to bridge the “shank” of your leg, from your toe to your knee, between two areas of rock. Place your foot onto the foothold and brace your knee against a suitably positioned hold, which can be large or inobvious and small. Solid kneebars provide “hands-off” rests that you can literally hang from for minutes.
Dyno/Deadpoint moves rely on momentum, and are often less strenuous than static reaches. The most dramatic dynamic move is the dyno, where the climber jumps for a hold, sometimes completely detaching from the rock. During a dyno, a climber springs up, driving with his feet and directing his trajectory with a low hand that may (or may not) remain clamped to the rock.
A deadpoint is more a quick hand movement, or hop, than a jump. To perform a deadpoint, push with your feet and pull with your hands simultaneously, holding on with both hands and throwing your center of gravity toward your target, concentrating like a laser on the hold you want to catch. Time the moment you grab the next hold with the apex of your body’s trajectory, that moment your body becomes weightless (the “deadpoint”).
Backstepping is used to elongate your reach. When you edge a foothold with the outside edge of your shoe, turning your hip so that the outside of it faces into the wall, you have some extra reach with the hand on that same side. Backstepping is especially important on overhung sections where you need every extra inch of reach, and shifting your body weight several times would quickly tire you out.
Sometimes letting one foot “flag” off the wall puts you in a better position than keeping both feet on.
Flagging is sticking one of your legs out to either side as a counterweight against the rest of your body. This technique is often used to prevent “barn dooring,” which is when your body swings away from the rock. Flagging is also great for when you have to reach far out for a handhold and need some weight on your opposite side to counterbalance yourself. To flag, simply find a juggy climb and practice balancing on wide reaches by flagging with your opposite leg.
GYM AS DOJO
“The gym is no substitute for outdoor climbing,” said the editors. Well, with one exception: When practicing the footholds, handholds, body movements, and even crack techniques discussed in this manual, stick to gym topropes to beef up your technique before you try scaling cliffs. The gym allows you to practice precise movement and limb placement on all types of holds. Once you’ve mastered this chapter’s content in the gym, then take your game outside.